How to deploy a laravel application to a VPS

Deploying applications to production the right way is not an easy task for newbies. At times even seasoned developers struggle with DevOps and end up taking days before their applications are available to the public. In this post, I will attempt to show how easy it can be to deploy a laravel application to production in a matter of minutes.
Prerequisites.
- A server running ubuntu 18.04 or 20.04
- SSH access to the server from a local terminal
- A project hosted with git (GitHub/GitLab/Bitbucket etc)
For the server, you can use any cloud service that suits you, I have personally used AWS and Azure, other services include Digital Ocean, Linode and Google cloud compute engine
For setting up git you can read the docs here. Github now supports free private repositories so you can use it for hosting your project, other alternatives include GitLab and bitbucket.
Once you have all the requirements setup you can now proceed with your deployment.
Log in to your server as root
Login to your server using ssh from a terminal. I recommend that you set up ssh keys on your server from the server monitoring dashboard if your service provider supports it.
1
ssh root@serveripaddress
or with ssh setup
1
ssh -i /path to ssh keys.pem root@serveripaddress
Once you login to your server there are a few things you need to fix before proceeding. Run the following commands to update packages list
1
2
sudo apt-get update
sudo apt-get install -y unattended-upgrades
Disable password login
Passwords are notoriously insecure at times and you should disable password login to your server. Once password login is disabled you can only login with ssh keys which are more secure. To disable password login, enter the following command to open the ssh config file in your favourite editor. (I am a vim user but you can use nano… but vim is cooler though :-) )
1
sudo vim /etc/ssh/sshd_config
Once the file opens in your text editor navigate to a line that says PasswordAuthentication. If the line is commented (prefixed by #), then remove the comment and make sure it is set to no. Save the file and restart ssh service with the following command:
1
sudo service ssh restart
Some service providers disable this by default and there is no need to do this step.
Install Fail2Ban
Fail2Ban is a program for Linux based servers that block hackers by scoring server logs and banning IP addresses with malicious patterns
1
sudo apt-get install -y fail2ban
Install web server
Nginx is awesome. For the majority of cases, Nginx will suit your needs. Enter the following commands to install and restart Nginx on your server.
1
2
3
4
5
sudo apt-get install -y software-properties-common
sudo add-apt-repository ppa:nginx/stable
sudo apt-get update
sudo apt-get install -y nginx
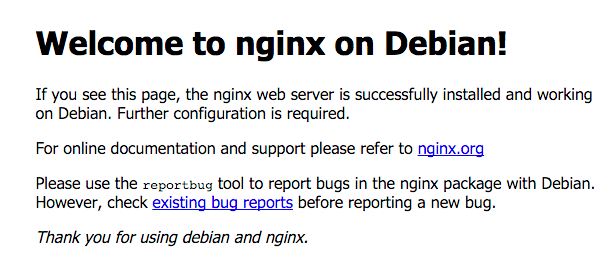
sudo service nginx restart
Now visit your servers public IP address in a browser (eg. http://127.0.0.1) and you should see a page similar to the following:
if you see an error output that mentions something similar to “Unable to resolve host”, try the command without the ‘sudo’ keyword
Install PHP 7, composer, curl, wget and other required libraries
Curl and wget are important HTTP tools needed for composer installation. Git is a source code management tool and will be required for pulling code repo to the installation server
1
sudo apt-get install -y git curl wget
Install PHP 7
PHP 7 is required for Laravel 5.7+. Before installing PHP 7 first check if there is no PHP 5 installed. Remove PHP 5 using the following commands:
1
2
sudo apt-get purge php5-fpm
sudo apt-get — purge autoremove
Once you are certain the PHP 5 is removed then proceed to install relevant repositories for PHP 7.
1
2
3
4
sudo apt-get install -y software-properties-common
sudo apt-get install -y python-software-properties
sudo add-apt-repository ppa:ondrej/php
sudo apt-get update
Install and restart PHP 7 using the following commands.
1
2
sudo apt-get install -y php7.4 php7.4-fpm php-mysql php7.4-mysql php-mbstring libapache2-mod-php7.4 php-doctrine-dbal php7.4-pgsql php-xml redis-server
sudo systemctl restart php7.4-fpm
Install composer for dependency management
Run the following commands on your terminal to install composer dependency manager.
1
2
3
4
5
6
7
8
9
php -r "copy('https://getcomposer.org/installer', 'composer-setup.php');"

php -r "if (hash_file('sha384', 'composer-setup.php') === '55ce33d7678c5a611085589f1f3ddf8b3c52d662cd01d4ba75c0ee0459970c2200a51f492d557530c71c15d8dba01eae') { echo 'Installer verified'; } else { echo 'Installer corrupt'; unlink('composer-setup.php'); } echo PHP_EOL;"

php composer-setup.php

php -r "unlink('composer-setup.php');"

sudo mv composer.phar /usr/local/bin/composer
Alternatively visit this page for installation instructions
Install Node and NPM
If your project has NPM dependencies then you need to install Node and NPM package manager with the following commands:
1
2
3
4
curl -sL https://deb.nodesource.com/setup | sudo bash -sudo apt-get install -y npm

ln -s /usr/bin/nodejs /usr/bin/node
sudo npm install — global yarn gulp-cli grunt-cli
Make your git repo production-ready
Create a production-ready version of your application on your development machine. Now, create a production branch using the following command.
1
git branch production
Now that the production branch is ready, check it out and push it to your repo.
Switch to the production branch
1
git checkout production
Merge changes in the development branch with your production branch.
1
git merge — no-ff master
replace master in the command above with your development branch name. Adding “ –no-ff” makes sure it creates a new commit so that we can track merges into the production branch
Push the production branch to your remote repository (Gitlab, Github, Bitbucket)
1
git push -u origin production
Pull production branch to the production server.
First, create a directory for your app with your app name under /var/www
1
sudo mkdir /var/www/app_name
Now cd into your application directory and create a new git repo.
1
2
cd /var/www/app_name
sudo git init
Add your git remote and pull your project to your server
1
2
git remote add origin https://github.com/user/repo.git
git pull origin production
Configure the Server to serve our app
Open the Nginx config file using a text editor (vim :-))
1
sudo vim /etc/nginx/sites-available/default
All edits to this file should be done within the ‘server{ }’ block.
Make URLs Pretty
Change the default ‘location / { }’ block’s contents from
1
try_files $uri $uri/ =404;
to
1
try_files $uri $uri/ /index.php?$query_string;
Disallow access to dot files (for obvious security reasons)
1
2
3
4
location ~ /\.
{
    deny all;
}
Add PHP capability
Find the following line
1
index index.html index.html index.nginx-debian.html;
and change by adding index.php to make it look like this:
1
index index.html index.html index.nginx-debian.html index.php;
For php7, add the following lines, replacing 7.4 with the actual PHP version you have installed.
1
2
3
4
location ~ \.php$ {
include snippets/fastcgi-php.conf;
fastcgi_pass unix:/run/php/php7.4-fpm.sock;
}
Now update the virtual hosts file to server our application.
change this line:
1
root /var/www/html;
to:
1
root /var/www/AppName/public;
Now we are done with editing the config file. Save it and run the following command to make sure our config is correct:
1
sudo nginx -t
If no error comes up then the config is okay, restart Nginx for changes to take effect.
1
sudo service nginx restart
Set Permissions
Set permissions for the public directory where public files are located.
1
2
3
4
sudo chown -R www-data:www-data /var/www/AppName/public
sudo chmod 755 /var/www
sudo chmod -R 755 /var/www/AppName/bootstrap/cache
sudo chmod -R 755 /var/www/AppName/storage
Now that permissions are set, its time to install PHP and npm dependencies.
1
composer install
may need sudo for this command
Install javascript packages and compile assets
1
2
npm install
npm run production
Setup database
Install mysql by following the following tutorial
Allow remote connections to sql
Alternatively follow the instructions below
Install MySQL 8.0 which is stable and works well with laravel and other application frameworks.
First, download the latest repository with the following command:
1
wget -c https://dev.mysql.com/get/mysql-apt-config_0.8.11-1_all.deb
Now install the downloaded deb file:
1
sudo dpkg -i mysql-apt-config_0.8.11–1_all.deb
Refresh the repositories (as always)
1
sudo apt-get update
Install MySQL
1
sudo apt-get install mysql-server
Once MySQL is installed, set up security using the following command
1
sudo mysql_secure_installation
Go through the prompts to complete securing your MySQL installation.
Once installation and securing is done the server should start automatically. You can check its status as follows:
1
sudo service mysql status
stop service with:
1
sudo service mysql stop
and start it again with:
1
sudo service mysql start
Now login with root user. This is root@localhost.
1
sudo mysql -u root -p
To allow remote connections and other IP addresses make sure to change the MySQL configuration file as follows:
Delete or comment the bind_address parameter from the my.ini file.
(The file name is different depend on the OS. On Linux my.ini is actually my.cnf located in directory /etc/mysql/)
Restart the service.
Create the root user (yes, a new user because what exists is ‘root@localhost’ which is local access only):
1
2
3
CREATE USER ‘root’@’%’ IDENTIFIED BY ‘123’;
Give privileges:
GRANT ALL PRIVILEGES ON *.* TO ‘root’@’%’;
For DBA user, add WITH GRANT OPTION at the end.
e.g. CREATE USER ‘root’@’%’ IDENTIFIED BY ‘123’ WITH GRANT OPTION;
Setup your environment
Create a .env file for the Laravel app using the following commands
1
2
cd /var/www/AppName
cp .env.example .env
Now open the .env file with your favourite text editor.
1
sudo vim .env
Change the necessary env variables. Change the following variables, as well as other variables that you may have to change such as database, AWS, Redis, mail, pusher configs.
1
2
APP_ENV=local
APP_DEBUG=true
to:
1
2
APP_ENV=production
APP_DEBUG=false
Now generate application key which will be used for encryption
1
php artisan key:generate
Now migrate your database (make sure you have correct database credentials setup in your .env file)
1
2
php artisan migrate:install
php artisan migrate
Setting up SSL with Lets Encrypt
Let’s Encrypt provides free SSL certificates. Let’s install it using Certbot
Follow this tutorial or alternatively use instructions below
1
2
3
4
sudo apt-get install -y software-properties-common
sudo add-apt-repository ppa:certbot/certbot
sudo apt-get update
sudo apt-get install -y python-certbot-nginx
Set up the website’s virtual hosts by opening nginx config file with the following command:
1
sudo vim /etc/nginx/sites-available/default
Change the following line, replacing example.com with your own domain
1
server_name _;
changes to
1
server_name example.com www.example.com;
and this
1
2
listen 80 default_server;
listen [::]:80 default_server;
changes to:
1
2
listen 80 default_server;
listen [::]:80;
Copy the newly created virtual hosts file into its own file and then to sites-enabled with the following command.
1
2
sudo cp /etc/nginx/sites-available/default /etc/nginx/sites-available/example.com
sudo ln -s /etc/nginx/sites-available/default /etc/nginx/sites-enabled/
Install your SSL certificate provided by let’s encrypt with the following command.
1
sudo certbot — nginx
And you are done, give yourself a pat on the back as your newly created application takes over the internet